

How to Use Cassandra Backup & Restore Method Using Conversational AI API
Apache Cassandra is a distributed Database Management System that handles a large amount of data across many commodity servers and provides high availability with no single point of failure. Cassandra apache replicates data among multiple nodes across multiple data centers. Its high scalability, high availability, and ability to handle huge volumes of transactions with fault-tolerant systems make it particularly beneficial to store and retrieve efficiently.
Why Use Cassandra Backup in Conversational AI
Apache Cassandra is a popular open-source distributed database management system that enterprises highly value for its ability to scale to handle large amounts of data and maintain availability even when individual nodes fail. It is known for its peer-to-peer architecture, cost-effectiveness, and ability to distribute data across multiple nodes. One of the main benefits of Cassandra is its ability to provide continuous backups, even when one or more nodes are down, making it a reliable choice for mission-critical applications.
Further, it’s also easy to scale, making it ideal for our businesses that are consistently growing.
Although Cassandra backups are designed to be highly available and resilient to failure, it is still important to create backups to recover from client applications’ errors or restore data in the event of data corruption or other catastrophic events. Cassandra backup and restore provides a built-in snapshot feature that allows you to create point-in-time copies of your data, which is used to recover from errors or restore data to a previous state.
Why Backup and Restore
Conversational AI API is intuitive and dynamic enough to read and write hundreds of data sets simultaneously. There might be a situation where—
- Data might be accidentally deleted from the disk/Database.
- An error occurs in data due to third-party applications.
- Data becomes corrupted.
- Disk Failure.
- Migrating data from one cloud platform to another platform and need to restore all data to the newly created Cassandra node.
In case we have to retrieve a large chunk of user data or transfer the data to another location can be a herculean task. So here comes the importance of periodic data backups.
Cassandra provides a built-in snapshot feature that allows you to create point-in-time copies of your data stored on the cloud cluster. You can take a snapshot of all keyspaces, a single keyspace, or a single table while the system is online. Additionally, one can use a parallel ssh tool like push to snapshot an entire Cassandra cluster in the cloud, providing consistent backups.
Let’s See How To Use Cassandra Backup And Restore Method
In Cassandra, data is replicated among multiple nodes across multiple data centers. Apache Cassandra stores its data in SSTable files. These SSTable files are in the keyspace directory within the data directory path specified by the ‘data_file_directories’ parameter in the cassandra.yaml file. In case if you don’t specify the path by default, the SSTable path will be var/lib/cassandra/data/<keyspace_name>.
For Example: If keyspace is system_auth then all data which are present in this keyspace will be stored in the below path.
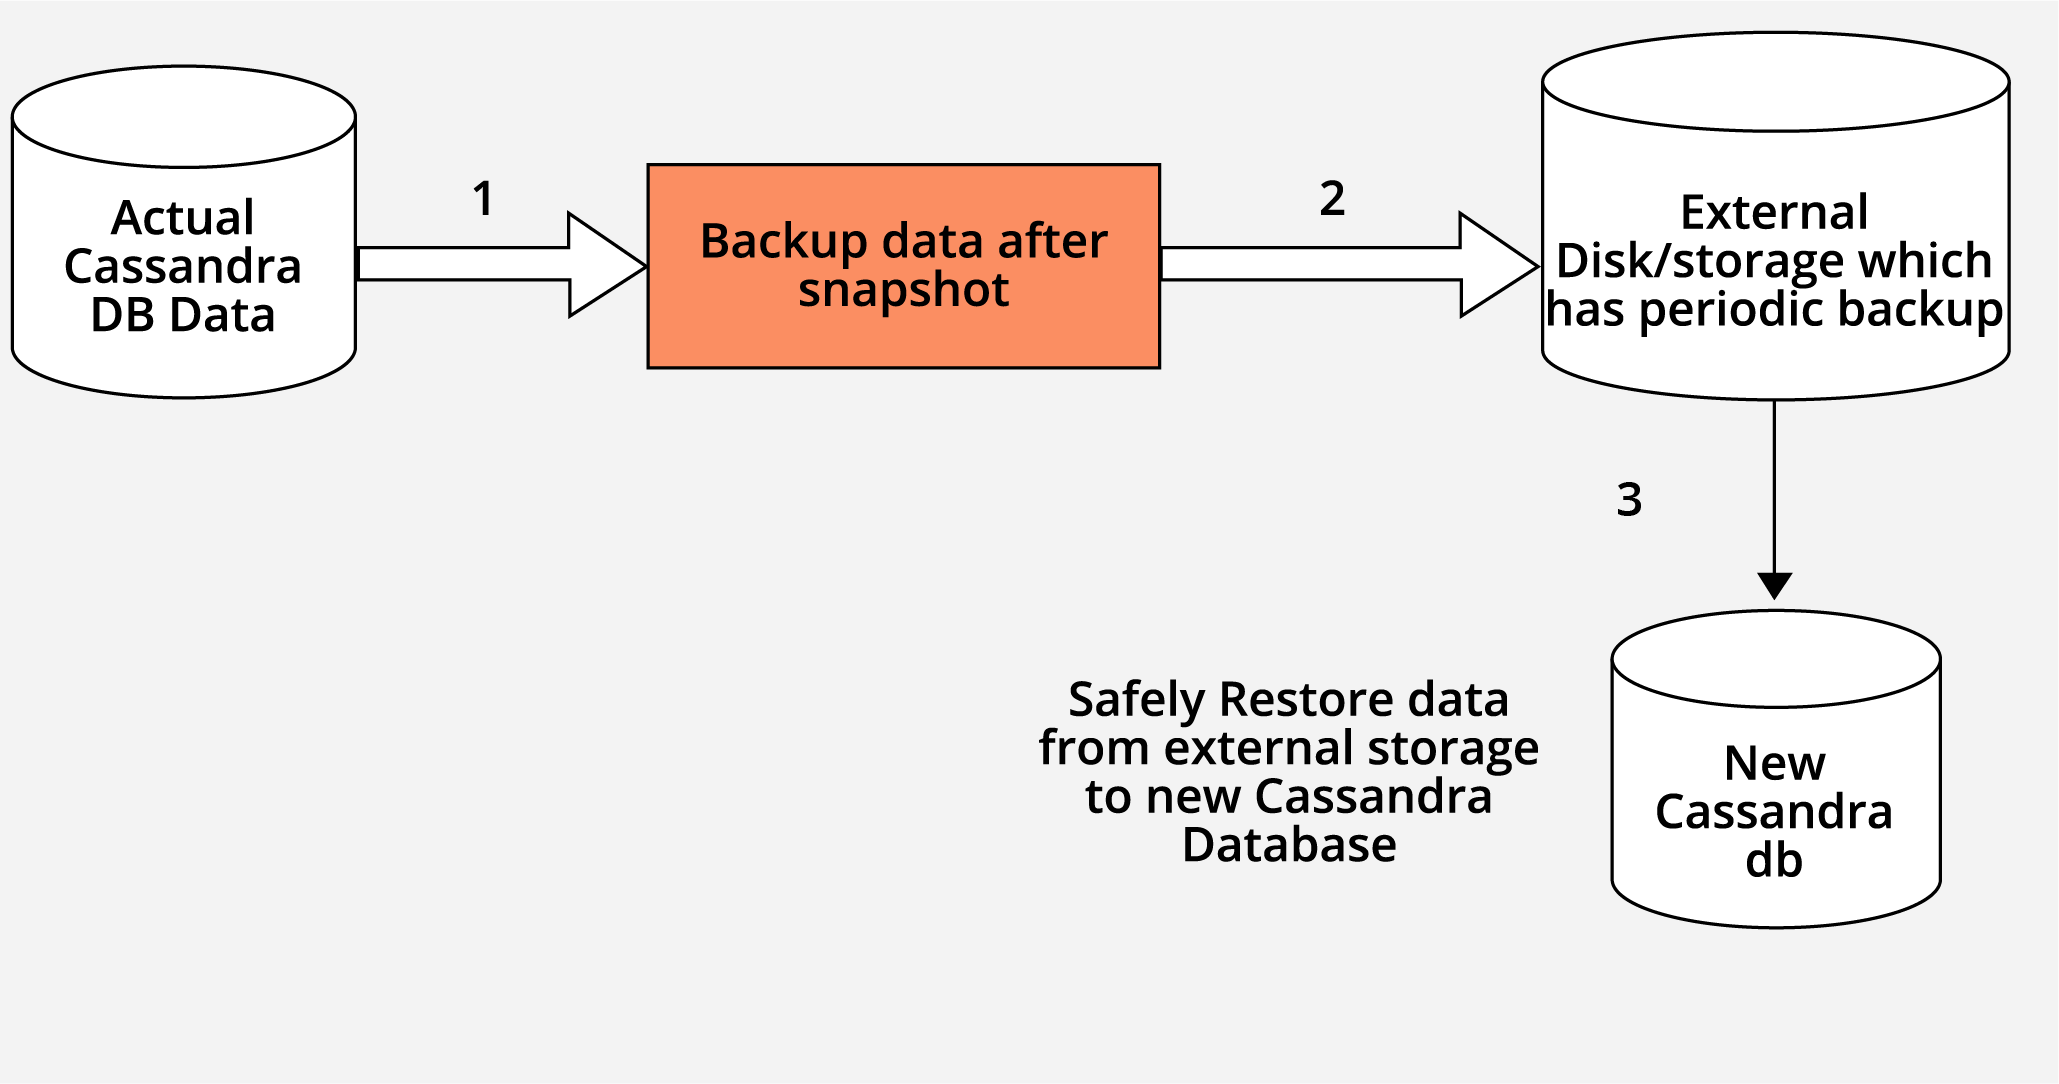
- Take a backup of existing data, it will be present in var/lib/cassandra/data/<keyspace>/<table>directory.
- Push your backup file to external storage.
- Pull data from the external disk/storage and push it back safely to your new Cassandra cluster.
NOTE: In case If you are using a cloud platform like Google Cloud, you have the option to enable the Casandra backup manually and can later use it to recover the data or restore to the node point you desire. See Google Cloud’s Cassandra Backup documentation for more information.
If you’re using a separate location or server for your application, there are two methods to backup Cassandra Data:
- Snapshot based backup
- Incremental backup
Snapshot Based Backup Method
To create backups of a Cassandra cluster, the nodetool utility provides a snapshot command that can be run on each node individually or in parallel using a tool such as pssh.It is possible to take a snapshot of all keyspaces in a cluster, certain selected keyspaces, or a single table in a keyspace. Nodetool utility is a command-line interface for managing a cluster provided by cassandra. This utility gives useful commands for creating snapshots of the data. Note that you must have enough free disk space on the node for taking the snapshot of your data files. It is important to ensure that there is enough free disk space on the node to store the snapshot of the data files. These snapshots can be stored locally or in the cloud for safekeeping.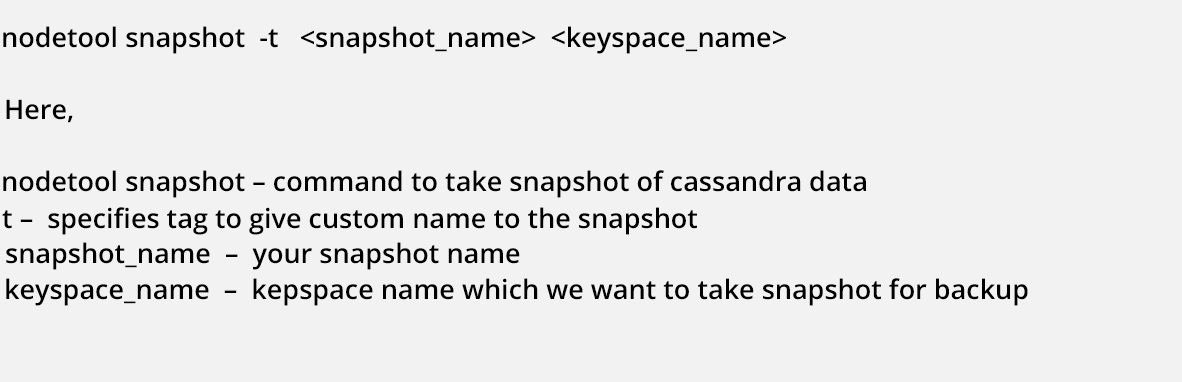
Assuming you already created keyspace, customers have some data present in it. Let’s see how to take a snapshot of this keyspace.
Step 1: Go to the Cassandra node using bin/bash
Step 2: Run the snapshot command

In the above picture,
nodetool snapshot – command to take a snapshot of Cassandra data
customers_keyspace_backup – this is the name we have given to the snapshot (If snapshot already exists with this name Cassandra will throw an error)
customers – this is keyspace name
The snapshot files will be present in the path var/lib/cassandra/data/<keyspace_name> by default in the snapshot’s directory of the particular keyspace.
Note: Make sure you have enough disk space on the server to store snapshots.
In Our case, the above snapshot can be found at, Var/lib/cassandra/data/customers/customer_data_

In this code —
customers – This is keyspace name
customer_data – This is the table name present inside keyspace customers
Step 3: After taking the snapshot, you can move the snapshot files to another location like AWS S3 or Google Cloud or MS Azure disk, etc., so that you can safely restore the data whenever required.
That’s it; you have successfully taken backups of your data.
For detailed information regarding Cassandra snapshots, see the Cassandra documentation.
Incremental Backup Method
By default, incremental backup is disabled in cassandra. This can be enabled by changing the value of “incremental_backups” to “true” in the cassandra.yaml file. Once enabled, Cassandra creates hard links to each memtable that is flushed to an SSTable in a backup directory under the keyspace data directory.In Cassandra, incremental backups contain only new SSTable files; they are dependent on the last snapshot created.
Incremental Backup needs less disk space because it only contains links to new SSTable files generated since the last full snapshot.
Cassandra does not clear incremental backup files automatically. If you want to remove the hard-link files then write your own script for that. There is no built-in tool to clear them. Additionally, incremental backups can create a large number of small files, which can make file management and recovery more difficult. It is also impossible to select a subset of column families for incremental backups.
Cassandra Data Restore Method:
Let’s say you have snapshot present in an external disk or in any external storage, and you want to restore that data back to your Cassandra node.
The steps below will guide you for the same
Step 1: Assuming you have created a new node
Step 2: Create keyspace and table If not created already. Make sure the keyspace name, table name, and the columns which you created newly must match with the schema which was present earlier when you took the backup (snapshot)
Step 3: Locate the snapshot folder where you stored the snapshot took as a backup (In our case, we named it as customers_keyspace_backup and stored it in the s3 bucket) and copy all files from that snapshot SSTable directory to /var/lib/keyspace_name/table_name-UUID directory
In our case, we have copied all files from the customers_keyspace_backup directory to the location
/var/lib/cassandra/data/customers/customers_data-bcb98f70059b11ecb8166d2c86545d91/

Note: In case if you have any data in /var/lib/keyspace_name/table_name-UUID directory, make sure you delete it before copying fresh data here)
Step 4: Run nodetool repair keyspace_name command.
The command should show you output like this.

Cheers, you have successfully restored the data.
Cassandra restore methods are great for businesses that handle gigabytes and terabytes of data. The file sizes become considerably smaller so that when businesses can easily transfer the data or restore the lost data relatively faster when compared to other methods.
Conclusion:
In this post, you learned how to backup and restore a table into a Cassandra database. The number of nodes in the source and target database cluster doesn’t matter; in case if you have more than one node you have to repeat the same steps in all nodes in order to restore the data in all nodes of the cluster.
Add multi-lingual Conversation AI into your system using our API and provide a human-like conversational experience to your audience.
Frequently Asked Questions
How do I backup my Cassandra keyspace?
To manually back up a keyspace, you need to use the nodetool snapshot command to build hard links. Run a custom script to back up these links. Then archive that backup. It is suggested to take a snapshot backup daily. Repeat these steps for each keyspace to back up.
How do you take Cassandra dump?
To dump a keyspace structure, we’ll use the DESCRIBE data definition command. The DESCRIBE command prints a description (DDL statements like create table) of a keyspace object. To dump table data, we’ll use COPY TO command with default options. COPY TO command copies data from a table to a CSV (Comma-Separated Values) file.